skip to main |
skip to sidebar
I'm starting a new semi-regular feature here at Table for Two, in which I will try to offer some tips and tricks on eating well without breaking the bank, especially when cooking for a small number of people.
A Lot From A Little Series 1, Post 1: How to Smoke a Chicken
Now that you've smoked your chicken and broken it down, you've got this big pile of delicious, moist, smoky chicken meat staring you in the face and begging to be used. So, you might ask, what exactly do I do with this stuff?
Well, for starters, you could eat it, just as it is. Whip up a batch of cole slaw, boil or grill some corn on the cob, slice a few tomatoes and drizzle with EVOO and sprinkle with salt, and you've got yourself one hell of a tasty and healthy end-of-summer dinner. We've done meals like this with subtle variations many times in the past, and its always delicious.
Or, you can just use it wherever you might otherwise use roasted chicken. It'd make a killer chicken noodle soup, or be a really interesting riff on chicken parm if mixed with a light and acidic tomato sauce and baked with a bit of fresh mozzarell and basil on top. (In fact, I think I'll be trying that next time...) Throw it in your favorite chicken pot pie or stew recipe, or sautee it in chili sauce for chicken enchiladas, burritos, or tacos. The light hickory smokiness would complement all of those things, and probably with very little recipe alteration.
However, if you're looking for something perhaps a little more creative or interesting than standard comfort food, let me tell you what we did with ours.
The day we smoked it (which, btw, was a Sunday, and I absolutely recommend making this a weekend project so you can take your time with it and relax a bit while the bird takes its smoke bath - perhaps by sitting outside with a beer and a good book) we used some of the meat to make grilled pizza for dinner. We've been trying to perfect our grilled pizza method all summer and wanted to get one more attempt in before the weather gets too cool and the days too short for grilled dinners. And I have to say that this time around was the absolute best yet - still not quite perfect, but we're close. So very, very close.

BBQ Chicken Pizza is hardly an original concept, and I have to admit that when its done right, I like it even better than regular tomato-and-mozzarella style pizza. I'm a sucker for sweet bbq sauce on just about anything, but when you throw in chicken and lots of cheese, well lets just say I'm not terribly proud of the lack of self-control I exhibit. Its downright shameful, it is. But I can't help it.
But when we made up our minds to smoke this chicken, and decided to give the grilled pizza another shot, it was just a natural jump from there to realize that the smoked chicken would be a perfect topping for a slightly charred and crispy crust off the grill. And if we were going for smokey and charred, the next logical step was bbq.
I pulled my beloved Williams-Sonoma Essentials of Baking off the shelf and thumbed over to the Pizza Margherita recipe, whose dough has been the basis of my experiments so far. This time around I halved the recipe, and used half bread flour and half semolina flour instead of all bread flour. Who knew semolina would make such a difference? The dough was softer, silkier, and stretchier, and rolled out to a perfect thin-but-stable round for the pizzas. And when it went on the grill, it bubbled and puffed and charred just like it would in a real pizza oven. I can't even describe how satisfying that was to watch - as soon as it started developing those big tell-tale bubbles, I knew I'd gotten it right.
Unfortunately our grill isn't big enough to make the pizzas completely outdoors, as you need to be able to move them away from direct heat in order to top them on the grill without burning the bottoms, so we grilled both sides and then brought them inside to finish them off. The crusts were topped with a thin layer of J's best-yet homemade sweet bbq sauce, followed by a generous amount of the shredded smoked chicken, some thin sliced red onions, a few slices of fresh mozzarella, and a generous sprinkling of an equal blend of shredded sharp cheddar and smoked gouda. The topped pizzas went on a baking sheet and under the broiler for just a few minutes until the cheese was melty and everything was hot, and the crust had taken on a bit more char around the edges.
When we took them out, this is what we got.

Looks pretty amazing, doesn't it? Almost like real pizza. And it damn near was.
I know we'll never achieve real pizzeria pizza at home without a brick oven - a standard kitchen oven will just never get hot enough. But I'm now a believer in grilled pizza as the best possible alternative - the high direct heat helps the dough to actually get crispy and to rise quickly enough to develop those big airy bubbles that I see as the hallmark of a real pizzeria pizza. And the crust this time was so, SO close to what I've been looking for in a homemade pizza crust. It was a bit on the dry side, perhaps, which I think I can remedy by adding more olive oil to the dough, and still a bit too dense and chewy in places, which I think could be fixed by letting it rise a bit longer than I did (which was almost not at all) to let the gluten develop. But I'm making progress, and I think next time I just might get it right.
But, I know, what you really want to know is how was the chicken on this pizza?
It was delicious. Perfect, really. The smokiness mellowed a bit among the sweet sauce, sharp onions, and creamy cheese, but was kept at the fore with the help of the smoked gouda. Everything melded into a near-perfect synchronous whole, all sitting atop that glorious crust... it was our best pizza effort to date.
And as a bonus, it was equally good the next day for lunch. Who says brown-bagging it has to be boring?
Next up in this series: Smoked Chicken Salad Over Greens.
I'm starting a new semi-regular feature here at Table for Two, in which I will try to offer some tips and tricks on eating well without breaking the bank, especially when cooking for a small number of people.
J and I are hardly poor. We both make decent salaries and we don't have a lot of the expenses that other people our age do, since we don't have children and live in an apartment where all of our utilities are paid for. However, we're not exactly rich, either - J's got his car payment and insurance, I've got train tickets to buy every month, and we both have credit card debt and cellphone bills. And, well, we live in NY, which isn't exactly famous for its low cost of living. Add to that the rising food costs and the failing economy, and our budget for cooking and eating at home becomes a pretty important one.
Consequently, although we are generally able to afford plenty of high-quality cooking ingredients and can even occasionally buy something special, like a nice artisan cheese or imported olive oil, quite often our meal planning revolves around getting the absolute most that we can out of everything we buy so that we know we're getting our money's worth.
One method we use constantly is to buy a large cut of meat, say a london broil or a pork roast or a whole chicken or bone-in turkey breast, and then portion it out (either before or after cooking depending on our meal plan) to get 2-3 dinners out of it, and sometimes even lunch for a couple days, since we both bring lunch to work most of the time. Usually the price per pound of these types of meats will be less than pre-trimmed, pre-portioned versions, and if you're clever you can have meat for a week off of a single cut, especially if, like us, you're only cooking for two.
This also has the added bonus of allowing us to occasionally enjoy a roast beef or turkey dinner with all the trimmings, without succumbing to Turkey Day Syndrome where we end up eating that same meal over and over again for the rest of the week. Repurposing leftovers is the best way to get the most out of your food without getting bored, and opens up a ton of options that might not have been there before.
The example I'd like to walk you through today involves not roasting, but outdoor cooking - smoking, to be exact. Big cuts of meat and whole birds are ideal for smoking, since the long, slow cooking process tends to bring out the best in even the cheapest cuts. J has an electric smoker for these sorts of things, but it possible to smoke food in a charcoal grill as well - all you need is some heavy duty tin foil.

 We started with a lovely Bell & Evans roaster chicken - we recently discovered this brand and fell in love with their chicken, always tender and moist and very flavorful.
The day before we planned to put it in the smoker, I mixed up a quick brine of equal parts sugar and kosher salt in filtered water, with a few bay leaves and whole peppercorns tossed in for good measure. The chicken went into a large ziploc bag, which then went into a second bag (insurance against leaks) and the brine was poured in, enough to submerge the chicken. I sealed up both bags and placed the whole thing in a big bowl just for a little added security, then slid it into the fridge to soak for the next 24 hours.

On smoking day I removed the chicken from its salt water bath and rinsed it quickly, then trussed it up with some butcher's twine. After a quick rub down with a bit more salt and a lot of black pepper, it was ready for some heat.
While I was doing that, J set some hickory chunks to soaking for about half an hour.

J set up the smoker with a layer of lava rocks around the heating coil, with the hickory chunks on top of that. Its taken a lot of trial and error for him to figure out how much wood and rocks to use depending on what he's smoking, as the smoker doesn't have anything resembling temperature control (hey, I bought the one I could afford at the time) so I'm not sure I can give too many specifics for how YOU should do this. Mostly I would just advise paying attention to the directions that came with your smoker if you're using one.

Also, if you don't have a smoker, all you need to do is build up a fire in your charcoal grill, and toss in a perforated, double-wrapped foil packet with your soaked wood chips or chunks once the flames die down. Keep the lid closed while you're cooking and it'll work just fine.

Anyway, once the smoker was assembled and ready to go, in went Mr. Chicken and on went the lid, not to be seen again for another 2 and a half hours.
J used just the right amount of lava rocks and wood chunks to keep a steady supply of low heat and smoke for the entire cooking cycle, but I'd advise checking on your smoking rig every 30-45 minutes or so to be sure you've still got both. You may need to add more wood or, if you're using charcoal, relight you fire at some point during the cooking process.
Use a meat thermometer to monitor how the chicken cooks - when it reaches 160-165 degrees in the thickest part of the breast or thigh, its time to pull it off the smoke and let it rest.
If you did it right, your chicken will now have this beautiful mahogany coat and a delicious aroma.

The most important thing to do now is to leave that bird alone for at least 15 minutes - it needs to come up a bit more in temperature, closer to 170, and the carryover heat will accomplish that. Plus, since its been brined, there'll be a lot of juices in the meat, and cutting it now would let all that yummy flavor escape. As the great Alton Brown would say, your patience will be rewarded.
Once the 15 minutes are up and the bird is cool enough to handle, grab your knife. Not that you'll need it much - it'll help you get through the skin, but if your bird is properly cooked you should be able to just pull it apart at the joints with very little help from tools, and slip the bones right out of the meat. Feel free to lick your fingers while you're doing this, because the juices will be delicious.
When I broke down our bird, I separated the legs and wings from the body and just pulled apart that meat with my hands, then carefully cut away the two breasts from the ribcage and sliced them into manageable pieces. Then I just picked off whatever meat I could find by hand. I removed all the skin at the beginning, and saved it to make something akin to cracklings in the oven later - sounds weird, but I tasted a piece while working with the meat and was struck by how much it tasted like bacon, smoky and salty. I just had to crisp it up and see if I could really make it like bacon. And it worked! The fat in the skin acted just like the fat in bacon and rendered out under the broiler to create a crispy, salty, and amazingly bacon-y snack.

This was, hands down, the best chicken that either of us has ever tasted. We've smoked chickens before, but often the smoke flavor was too strong - this time it was perfect, savory and aromatic, and the meat was tender and juicy and perfectly seasoned thanks to the brining step. It was addictive in a way I've never known chicken to be, and I kept sneaking little bites because I couldn't get enough of the flavor. Its a good thing we had plans for all that meat, or I doubt it would've lasted long.
Once you've broken down your bird, you can bag and freeze the meat for use at some later date (it'll last months in the freezer) or keep it in the fridge and use it within a week.
Next up in this series: BBQ Smoked Chicken Pizza, on the grill!
I wonder sometimes what all the other food bloggers do for a living, whether or not they have non-blogging hobbies, how long they actually spend on their blog posts... because I just can't figure out how to keep up! I have a four-part series of posts planned on how to make and use a whole smoked chicken, several nightly meals and lessons-learned types of posts to write, and we're still cooking every night so the list just keeps getting longer. Perhaps I'm not prioritizing my posts well, or perhaps I'm just not devoting enough time to this, but honestly, some nights I just want to plunk my butt on the couch and watch cartoons and don't want to go near my computer or the internet.
And all that's just a long-winded way of saying I've got a ton of posts lined up, but I'm being slow about actually posting them. And now I'll have to line-jump a bit, because its Barefoot Bloggers time again, and I've got Cream of Wild Mushroom Soup to share with y'all (chosen by Chelle of Brown Eyed Baker) and I'm already late on this.

I gotta admit, I sorta dropped the ball on this one. I nearly forgot until we were halfway through our weekly shopping trip at Iavarone and I wandered past a display of dried porcini mushrooms and sorta froze in my tracks as the realization slowly came to mind that I was supposed to be making soup this week and I HADN"T CHECKED THE RECIPE. I had no idea what I needed, beyond the obvious - mushrooms, some sort of liquid dairy product. Probably butter. No clue.
So, I had to wing it. We bought white button mushrooms and shiitakes, and a package each of dried porcinis and dried morels (totally unnecessary but hey, what the hell). I bought some 2% milk, because I did remember that the recipe called for both half-and-half and heavy cream in pretty large quantities and there was just no way I was making it as written. I'm the kind of person who'd just need to look at a bowl of soup that rich and I'd gain 5 lbs. No sir, this recipe needed to lighten up a bit.
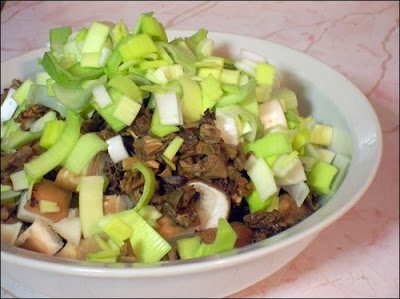
Getting back to the point, though, I sort of trusted to my pantry and fridge to supply me with any other ingredients for the soup, and for the most part, I got lucky - we had a single leek hanging out in the crisper drawer from last week, some dried thyme on the wall-o-spice (remind me to share some pictures of that soon) and fresh parsley wrapped up in a damp paper towel in the fridge, I had butter and flour already since they're pretty standard pantry items. Of course it was at this point that I looked at the recipe and realized I'd forgotten the portobellos, but I figured that white buttons are just a milder version of creminis, which are a baby version of portobellos, so they'd probably be an ok substitution. Especially since I'd be using porcinis and morels, some of the most flavorful mushrooms in the world. I wasn't too concerned.
And then, last night, I started pulling things out of the fridge and off the pantry shelves to make the soup for dinner, and brought the recipe up on my computer to check on the order of operations.
That's when I saw the white wine on the ingredients list, and realized I didn't have any.
That's also when I realized I'd stupidly used up all the white button mushrooms in dinner the night before, completely forgetting that I STILL HAD TO MAKE SOUP.
Staring at my motley mis en place, I realized that with my intentional substitutions and accidental omissions, this soup was hardly going to resemble the Ina's original. Dammitall, and it's only my second BB recipe. FAIL.

But, we still needed dinner and I still needed to make something to post, so I figured that with as much as I was already changing the recipe, I'd just try to follow Ina's method and wing the rest.
And honestly? It was great. It was rich, silky, highly aromatic and flavorful, but not at all heavy. I know that had I made the soup with the amounts of half-and-half and cream that the recipe called for, I would've been hard-pressed to eat more than a few spoonfuls of it. But this lighter version had all the flavor without all the heavy dairy fat, and I was able to enjoy a whole bowl of it without feeling like I'd swallowed a 5lb boulder. Much the opposite, in fact - my substitution of lemon juice for white wine made the finished soup light, tangy, and fresh.
Because I changed the recipe so much, here's my version. I can't speak for the original, though I'm sure its delicious, but I think this is a great lighter alternative that I hope at least stays true to the spirit of Ina's recipe.
------------------------
Creamy Wild Mushroom Soup with Lemon and Thyme
Based on Ina Garten's Cream of Wild Mushroom Soup
I didn't really measure a lot of things while making this soup, so I'm giving remembered approximations here. If I make this again, I'll be sure to pay better attention to measurements and post an updated recipe. I will say that I tried to half most of the measurements in Ina's recipe, and it made exactly the right amount for two people as a side with dinner.
Feel free to mix and match mushroom varieties here - as long as you've got at least 2-3 kinds, and at least one of which is very flavorful (like porcini) you should end up with a very tasty soup. This particular combination worked well for me, but as it was almost entirely unintentional I would not be surprised if there's one that's better.
4-5 large fresh shiitakes
1/4 each dried porcinis and dried morels
1 cup boiling water
1 carrot, diced
1 stalk of celery, diced
1/2 white onion, diced
1 leek, diced and rinsed well
5 cloves of garlic, smashed
1 tbsp EVOO
2 1/2 cups chicken stock or broth
3/4 cup milk (I used 2%, but anything other than skim would probably work fine)
1 tbsp butter
1 tbsp flour
1 tbsp creme fraiche
juice of one lemon (about 1/8 cup)
1 tsp dried thyme (or a couple sprigs fresh)
1/2 tsp black pepper
salt to taste
Place the porcinis and morels into a bowl and pour over the boiling water. Let stand for 20-30 minutes or until the mushrooms have softened.
Wipe the shiitakes clean with a damp towel. Separate the stems from the caps and set aside, then dice the caps into bite-sized pieces.
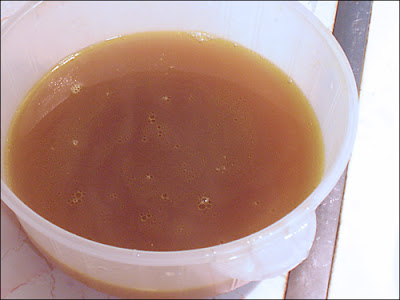
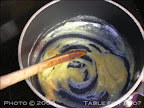
Heat the oil in a large saucepan over medium heat. Add the carrot, onion, celery, and garlic (and fresh thyme if you're using it). Chop the shiitake stems and add them to the pot as well. Cook the veg gently until they begin to soften, but do not brown, about 5 minutes. Add the stock and bring to a boil, then reduce the heat and simmer for about 30 minutes. The stock will reduce to probably closer to 1 1/2 cups. At this point, remove it from the heat.
Remove the porcinis and morels from their hot tub and rinse very well in a colander, then dry slightly on a paper towel. Chop the porcinis and morels relatively finely. (Personal preference - I love the flavor of dried mushrooms but not the texture, even after they've been reconstituted, so chopping them finely cuts down on the unpleasant mouthfeel for me. You can chop them more coarsely if you don't have my ridiculous hangups.)
Line the colander with cheesecloth (I used 4 layers) and strain the water that the mushrooms soaked in into a bowl - this will remove any dirt and grit and leave you with a deliciously fragrant mushroom broth. Rinse the cheesecloth, put it back into the colander, and strain the enhanced chicken stock into the same bowl as the mushroom broth. Twist up the cheesecloth and squeeze it to get as much liquid out of the veg as possible (be careful if its still hot!). Discard the veg and set the stock aside.
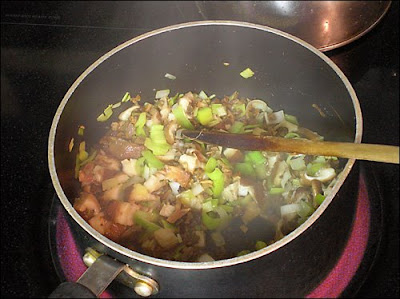
Clean and dry the saucepan you used to make the stock and put back on the stove at medium heat. Add the butter - when it melts, add the diced shiitake caps, chopped porcinis and morels, diced and rinsed leeks, dry thyme, and pepper. Sautee until the musrooms and leeks are softened and have given up most of their water and are starting to brown around the edges. Deglaze the pan with the lemon juice, and cook a minute or two more until most of that liquid has evaporated/been absorbed. Add the four and stir to coat all the veg in the pan evenly, and cook for another minute or so to get rid of the raw flour taste.
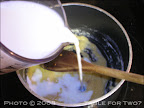
Slowly add the stock back to the pan, stirring constantly to ensure no lumps form. Once all the stock has been incorporated, bring to simmer just to be sure its heated properly, then remove from the heat. Add the milk and creme fraiche, then taste for seasoning and add salt as needed. If desired, garnish with some chopped fresh parsley. Serve immediately.

We ate this with some red-wine braised hanger steak and simple sauteed spinach, which made for a pretty decent steak-house-dinner-at-home sort of meal. The steak was actually especially interesting to us because after braising it, J tossed it into a really hot cast iron skillet to sear the outsides, and although the end product was a touch on the dry side, it had a very similar texture and flavor to pork carnitas. Which got us thinking - could we use this alternative cooking method to make an Italian or Mediterranean beef carnitas? Probably. This may be revisited later.
Working in a university, you start to measure your life in semester-length increments. You learn that the from summer into early fall, the time of year when most people are busy relaxing and doing nothing, you'll be tearing your hair out trying to keep dozens of meetings straight and finishing all your big projects before The Day The Kids Come Back.
Summer at a university is not the time for taking it easy; its the time for getting all the work done that you can't do during the year when the students and faculty are around to occupy your time.
And THEN, the fateful day arrives and the new academic year begins, and suddenly everyone on campus has taken a renewed interest in the services you're there to offer, and if you thought things were busy in the three months previous you've got NO idea, brother. In a week's time, I think I had more meetings and new project requests than I'd had all summer.
Think about that for a second, and you'll understand why by last Thursday I needed fried veal and potato soup for dinner.

J, being of almost entirely German heritage, has an understandable devotion to Eastern European fare. Unfortunately, since most of the German foods he (and I) love basically consist of meat, potatoes, and cabbage, usually with a fair amount of fat thrown in for good measure, we don't cook it very often. But Iavarone had some lovely little thin veal cutlets over the weekend and J was inspired to put a couple of German meals on the menu for the week. Luckily for me, it just happened to work out that we had both meals on days when I really, really needed them.
The weekend previous I made a batch of homemade pierogi stuffed with potato and onion and froze them, so that on Monday, when I came home at 9pm after a long work day follows by a two-hour chorus rehearsal, J greeted me with a hug and a kiss and a steaming plate of kielbasa, sauerkraut, and pan-fried pierogi. *swoon* Be still my heart... there is nothing sexier than a man who'll cook for me.
Then on Thursday, when I had 4 excrutiatingly long days behind me but still one more to go and was feeling about as tired as I've felt in months, J made wienerschnitzel with mushroom gravy and I made creamy potato soup with broccolini and caraway and a spoonful of crispy diced kielbasa on top, and all of a sudden things seemed a whole lot better.

Potato-Broccolini Soup with Kielbasa and Caraway
1 large russet potato, peeled and diced
1 bunch broccolini, cut into 1/4-1/2" pieces
2 garlic cloves, smashed
1/2 cup diced white onion
3 cups chicken stock
1 tsp caraway seed
1 tsp spicy brown mustard (I used Boar's Head because its what we had, but would have preferred something grainier)
1 tbsp creme fraiche
1/2 cup diced kielbasa
2 tbsp butter
S&P to taste
Melt 1 tbsp butter in a large saucepan over medium-high heat. Add the onions and garlic and sautee until slightly softened and translucent, but not browned. Add potatoes, broccolini (reserving about 1/4 cup), and caraway seed and sautee for a minute or two just to get things up to temperature. Add the stock and bring to a simmer. Cook until the potatoes and broccolini are soft enough to mash with a fork.
Meanwhile, heat the remaining tbsp of butter in a small sautee pan and add the kielbasa and remaining broccolini. Cook, stirring occasionally, until the sausage and veg are heated through and slightly browned and crispy on the outside. Remove from heat and set aside.
When the veg in the soup is smashably-tender, remove from the heat and add the mustard and creme fraiche, stirring to combine evenly. At this point you could serve the soup as is, but I chose to put my trusty immersion blender to work and whizzed everything up until it was velvety smooth. Not that I have anything against chunky soup, but this had the added benefit of pureeing the caraway along with the veg, making for a more consistent flavor. You could grind the caraway before adding to the pot if you wanted to get around that but still have a chunky soup, but I'm frankly too lazy for that mess.
To serve, ladle into bowls and gently top with a big spoonful of the crisped kielbasa and broccolini. Enjoy while still hot, preferably with a big hunk of dark pumpernickel bread or a plate of your favorite German dish. Like wienerschnitzel, especially if its cooked by someone as inarguably German as J.
Pairing this with a glass of riesling or a gin and tonic (preferably something good like Tangueray) is just gilding the lily... I'm quite a fan of gilded lilies, myself.
I don't know what things are like in your neck of the woods, but around here summer has been quietly fading away into the amber chill of autumn, and its all I can do not to jump and cheer out loud because MAN have I had enough of heat and humidity. I'd nearly forgotten what its like to actually sleep comfortably at night. And with a blanket! Truly, my friends, a delicious luxury.
But despite being overjoyed at the slow return of golden days and crisp blue skies, long-sleeved shirts and pumpkins in the markets, I will admit a lingering sadness that all the summer cooking and eating that I love dearly are going away for another year.
The transition from summer to fall is always a bit difficult to navigate for me - I'm so totally ready for soups and braises and long-roasted hunks of meat, but I'm not quite ready to give up the grill. I haven't had enough corn and tomatoes yet! And I've only JUST made my first batch of pickles. And its getting colder by the day.
So, over the last two weeks (when I've been embarrassingly absent from this blog) J and I have been milking what's left of summer for all its worth and enjoying lots of warm-weather foods for probably the last time this season. Maybe in another week or so I'll be ready to say farewell to summer, and at least I'll have the memories of these dishes to carry me through until May.
--------------------------
Roasted Chicken Thighs with Summer Corn Salad
Yes, yes, perhaps I'm playing out the chicken thigh thing, but seriously, if you were able to get consistently fresh, juicy, BIG chicken thighs for less than $3 a pair, wouldn't you get a little bit obsessed?

This was, until this past weekend, the best chicken that J or I had ever eaten, bar none. The preparation really wasn't all that different that this recipe with lemon and oregano, but we adjusted the cooking technique a bit by switching the oven from bake to broil when the meat was still just slightly underdone, turning the thighs skin side up and moving them close to the heating element to crisp the hell out of the skin. And for once, it really worked! The skin was crisp almost to the point of shattering, and so incredibly flavorful from the lemony marinade and pre-cooking sprinkle of kosher salt. The meat beneath stayed moist and tender and intensely chicken-y, more so than any chicken we've ever cooked or eaten before. It was PERFECT. And of course, when we tried to do it again a week or so later, we failed. Eventually, I swear, we will learn to take notes and be consistent with our cooking. (In all seriousness, I hope that this blog will help with that, but its yet to be proven so we'll see.)
As good as the chicken was though, it was very nearly surpassed by summer corn and tomato salad we had as accompaniment. Making and eating this salad was a humbling lesson in simplicity - I tend to forget that sometimes, the most basic preparation is the best, and that when you have really good ingredients the only way to do them justice is to let their flavors shine all on their own. And that's what I did here.
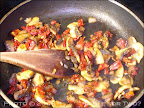
Two ears of corn and one Italian green frying pepper went under the broiler for awhile to roast and blacken a bit, allowing the sugars in the corn to caramelize and the pepper to soften. Meanwhile I chopped up some red onion and halved some tiny sweet grape tomatoes and tossed them in a big bowl. When the pepper and corn were cool enough to handle, I peeled, deseeded, and chopped the pepper and shaved the kernels off the cobs, and tossed them in with the tomatoes and onions. Add a dash of red wine vinegar, a splash of good olive oil, a pinch each of sugar and kosher salt, and a few cracks of black pepper, and combine.
That's it.
Seriously, trust me on this. If you've never had corn cooked this way, you'll be amazed at how much sweeter and, well, more like corn it will taste. Fresh corn turns into sweet, tender gold when it gets hit by some dry heat, and combined with the sharply pungent red onions, fruity and juicy tomatoes, and slightly bitter roasted peppers, you end up with a salad that is beautifully balanced in both taste and texture, and truly beautiful on the plate in its yellow, red, and green glory. The dressing here is mostly just a binder and a flavor enhancer - you shouldn't really notice it on its own, but it should complement all the other flavors that are going on. We've made corn salads and salsas before, but never one as good as this. I'll be coming back to it next year, for sure.
-----------------------
Grilled Curry-spiced Pork Tenderloin with Chana Masala
There isn't really much to tell about this meal except that it was almost shockingly good. The pork was brined overnight, then rubbed with J's homemade curry spice mixture and grilled until just cooked through and blacked a bit on the outside. The Chana Masala was made using the recipe on Orangette almost verbatim, though I halved the recipe and added in some potatoes, and it was absolutely perfect - buttery chickpeas, velvety potatoes, sweet-tart tomatoes, and just the right amount of spice (so many of the Indian recipes I've tried have just been so heavily spiced that I couldn't really enjoy them). That recipe is going in our tried-and-true collection. Thanks Molly, for posting it, and thanks to Brandon for coming up with it!

Incidentally, though the grilling made this pretty summery for me, I think I can say with a fair amount of reliability that we'll be repeating this meal in the fall and winter - the chana masala is so hearty, and the pork can just be cooked in the oven. Because really, who doesn't love a hunk of roasted pork when the weather's cold?
-------------------
Surf-n-Turf with Grilled Portobello and Mixed Greens
We gave the grilled surf-n-turf another go, and it came out much better this time. The shrimp were grilled on skewers rather than in a pouch, and were still slightly overdone but miles better than the last attempt, and the steak was cooked to somewhere between medium-rare and medium. Still a bit overcooked for my tastes, and to tell the truth it just wasn't a great cut of steak so it as still a bit tough, but it certainly tasted good. And the salad was an easy-peasy success, made up of some washed spring mix, thinly sliced red onions, a couple grilled and sliced portobello caps, some shaved parmesan and a drizzle each of fruity EVOO and aged balsamic. Fresh and tasty, for sure, and look how colorful!

(This was also the first meal I photographed with my new set-up, so I just had to share!)
----------------------
Masala Burgers with Fresh Mango and Sweet Potato & Pea Salad
This was one of those hugely dichotomous meals where one part was made of total win, and the other was a nearly dismal failure. In this case, the garam-masala-spiced burgers with fresh mango? Delicious. Almost tropical with their blend of spicy and sweet, and an extra little twang from a squeeze of fresh lime juice and a hint of richness from a drizzle of curry aioli. I could've eaten those burgers for a week straight.
The salad, however? Not so much. It seemed like a great idea: sweet potatoes go great with both tropical and Indian flavors, and potato salad is a classic pairing for a burger, and we could even grill the potatoes at the same time as the burgers - thus, the curried sweet potato salad was born. The peas were sort of a last minute addition, in an effort to get a green vegetable onto our dinner plates, but I reasoned that peas are pretty common in curries as well, and their natural sweetness ought to complement that of the sweet potatoes. It all made perfect sense. Right?
Well, apparently not. I'm not even sure I can pinpoint where it went wrong, though I'm pretty sure the dressing had a lot to do with it - I was hoping for a light, saffron-scented dressing with a bit of Indian spice for warmth and lime juice for brightness, but what I ended up with was an oddly-colored concoction that didn't really taste strongly of anything you could pick out and tasted disturbingly milky to me because I used some creme fraiche in place of part of the usual mayo.
Even with the less-than-stellar dressing, it might have been alright had the sweet potatoes had any flavor of their own to speak of, but they were oddly bland despite having been seasoned and grilled.
I barely ate any of mine (though that was partially due to a minor allergic reaction that I sometimes get with curried foods). J ate his with enthusiasm and said he really liked it, but then the extras that got shoved in the fridge sat there for a week until they finally needed to be thrown out, so I'm guessing he didn't like it as much as he claimed. Ah well. You can't win 'em all, right?
This is my first month as a member of the Barefoot Bloggers, and the first recipe this month was Ina's Grown-Up Mac and Cheese, chosen by Heather of Randomosity and the Girl. I love love LOVE mac and cheese, and grew up eating the homemade baked variety rather than the ever popular blue box, so I must admit a bias toward this sort of recipe. I made a few adjustments to the original recipe to make it just a bit healthier, but it was truly delicious and extremely satisfying paired with some sauteed sugar snap peas and green beans for dinner last night. Great choice Heather!
The original recipe called for gruyere, sharp cheddar, and a blue cheese (Ina specifically recommends roquefort) and an addition of crisp bacon. I replaced the gruyere with my beloved prima donna, which I've always likened to sort of a combination of swiss and parmesan - salty and tangy, hard but not crumbly with a smooth mouthfeel, and in my experience quite meltable - and used a fairly high quality stilton for the blue cheese. I also skipped the bacon in favor of a rather healthier combination of sauteed white button mushrooms, sundried tomatoes, and red onions. Finally, I made my standard substitution of whole wheat elbow macaroni for regular white pasta (hence the dark color in my finished dish). Interesting to note, I recently discovered that Hodgson Mills, my favorite specialty flour producer, also sells whole wheat pasta that is quite tasty.
Otherwise I followed the recipe technique almost exactly, and although it was nothing new for me, as I make mac and cheese with basically this method all the time, it came out extremely well.
 Partial mis en place - white button mushrooms, diced sundried tomatoes and red onions, whole wheat pasta, and cheeses.
I started by getting some salted water heating on the stove while dicing up the sundried tomatoes and red onions and thinly slicing the mushrooms. When the water came to a rolling boil, I dumped in the pasta and gave it a stir to keep it from sticking.
 Taking action shots is hard!
Then I shredded the prima donna and cheddar and crumbled the stilton - I used rather less of the stilton in proportion to the other cheeses than the recipe called for, because I'm just not that fond of blue cheese. I probably used half what the recipe called for.

While the pasta finished cooking, I heated some olive oil in a small skillet and sauteed the mushrooms, sundried tomatoes, and onions with a bit of salt and chicken broth until they were softened and any liquid in the pan had evaporated, allowing them to caramelize just a bit. These I set aside until it was time to assemble the final casserole.
I cooked the pasta about 5 minutes so that it would be just slightly underdone, wanting it to finish cooking in the oven so it would soak up all the flavors of the cheese and veg.
One of the complaints many of the Barefoot Bloggers seem to have about this recipe is the number of pots, pans, and tools required to make this dish. But with a little thought, its pretty easy to cut down on the number of dishes necessary. For example, the recipe directs you to scald the milk in a small saucepan. But I see no reason to do that - why not just microwave it in the measuring cup? All you're really looking to do is warm it through so that it thickens evenly when added to the roux (equal parts flour and butter). And if you're patient enough to take your time with things, you can use the same pan that you used to cook the pasta to make the sauce - just wait till the pasta is cooked and drained, the rinse out the pot and put back on the heat to make the roux. Right there you've knocked out two dirty pots.
Anyway, once the pasta was draining in a colander I got the roux started - 1 tbsp each flour and melted butter, cooked for just a minute or so to cut down on the raw flour taste - I added the warmed milk slowly and stirred with a whisk to get rid of any potential lumps. This mixture cooked for a minute or two until it started to thicken, then was removed from the heat. I added in the cheese mixture in 3 parts, whisking well after each addition to ensure that the cheese melted, creating a smooth, thick cheese sauce. Once all the cheese was melted I added some freshly cracked black pepper and a bit of freshly grated nutmeg, and a shake of garlic powder because I never make anything savory without garlic.
Once the sauce was done I stirred in the pasta and sauteed veg, then divided the resulting mixture evenly between 4 small casserole/brulee dishes.
Another note here: the original recipe claimed it would serve two, and I knew I wanted to have this along with some green veg for dinner, so I halved it, expecting to end up with two appropriately sized side-dish portions. I ended up with twice that much, which tells me that the original recipe would easily serve four for dinner as a main course. I can't imagine the appetite that would allow a single person to eat the entirety of the amount I ended up with... it was a LOT of macaroni. Not that I'm complaining, because it meant both J and I got to have an especially yummy lunch today, but it seems like a rather major flaw in the original recipe.
 I think this may be the best food photo I've taken yet. Just looking at it makes me smile.
The casseroles were placed on a baking sheet for easy movement, then topped with a mixture of plain dry bread crumbs and dry thyme, as I was lacking the fresh basil that the recipe called for and was frankly too lazy to process my own soft bread crumbs. The baking sheet was slid into a 400 degree oven to bake for approximately 20 minutes (adjusted from the original 35-40 mins to account for the much smaller dish size) while we enjoyed a glass of Barefoot Vineyards Cabernet Sauvignon (appropriate, no?) and prepped our green bean/snap pea side dish.

The smell while these things were cooking was fantastic, and when the oven timer beeped I opened the door to reveal some beautifully golden-brown dishes of deliciously aromatic mac-and cheese. It was all we could do to let them rest and cool down for 5 minutes while we finished the veg accompaniment.

Now, while I can imagine that the original, unaltered recipe would be delicious (because I absolutely love gruyere, and everyone knows that bacon makes everything better), this was the most satisfying mac and cheese I've made in awhile. The flavor was very well balanced between the sweet sundried tomatoes and onions, earthy mushrooms, and salty/tangy cheese, and texturely it was perfect, crispy topping hiding a smooth, creamy interior. J expressed that he would have liked a more pronounced blue cheese flavor, which undoubtedly would have come through had I kept to the original cheese proportions, and unfortunately I think the identity of the prima donna was lost aong the other flavors, but the cheesiness as a whole was delightfully sharp and well-rounded. Grown-up mac and cheese, indeed! I can't imagine many kids who would appreciate this dish for what it was.
Thank goodness I'm a grown-up.
 Man, I wish I had some more of this right now... good thing for my waistline that its all gone!
Would I make this again? Absolutely. But then, as I said, this wasn't all that different from my standard mac and cheese technique, which I have always loved. I just wish I could allow myself to make it more often, because this really was the epitome of comfort food to me.
I definitely recommend the vegetarian substitutions I made here though - even an adamant meat-eater like J didn't miss the bacon in this, though we both agreed that the addition of any pork product would just about throw this dish into the stratosphere.
I would like to try a similar dish with almost entirely prima donna - we made a fondue with it once and it was out of this world, so I can't imagine what it would be like as the sole cheese in mac and cheese - and would also like to experiment with other add-ins (chicken and peas perhaps? Or maybe sausage and peppers, especially if some parmesan and shredded mozzarella got added to the recipe). Or on a slightly weirder vein, I've got some fresh pumpernickel bread crumbs that I think would make a lovely mac and cheese topping... imagine the cheese sauce made with sharp cheddar and beer and mixed with some diced kielbasa and drained sauerkraut. I love German-inspired food, and this simply must be tried.
But that's the beauty of a dish like this - infinite possibilities for variation, and infinite ways to adjust the recipe to suit your tastes. Really, its not so much a recipe as a technique, and once you learn that technique, you could do almost anything.
I love that kind of recipe.
Next up for the Barefoot Bloggers: Cream of Wild Mushroom Soup!
Iavarone Bros., the specialty Italian grocery store where we do the bulk of our weekly shopping, has been carrying some absolutely gorgeous sushi-grade tuna steaks every week for the past couple months, and every single time we're there I gaze longingly at them, consider buying one, then glance at the price tag before shaking my head mournfully and walking away. But this week I vowed that we would have one for dinner, and I kept my promise, walking resolutely up to that fish counter with head held high and declaring that I would have on of their fine sushi-grade tuna steaks, please. And then the fishmonger handed over that parcel of pure culinary gold, and all pretense of sophistication disappeared as I skipped off to present J with our newest treasure, giggling maniacally.
This, my friends, was some truly beautiful fish.
What a shame that I didn't think to snap a photo before it was cooked. It was about a 3/4 lb steak, all deep red and semi translucent, just barely marbled, firm but ever so slightly soft to the touch, practically glowing with fishy goodness.
For once I really took my time on this meal, being careful to time things correctly so that everything would be done just when the fish was medium-rare and slightly cooled from a brief rest after cooking in the fridge. I kept things simple so that the flavor of the fish would really show through, and paid special attention to things like complimentary textures and temperatures. And my, oh my did it pay off. I don't like to toot my own horn too much, but honestly, to me this rivaled anything I'd ever had at a restaurant. The fish was tender and buttery with a delightfully crisp and crunchy exterior from a generous coating of white and black sesame seeds, and especially flavorful from a brief marinade in soy sauce, mirin, sesame oil and black pepper. Sticky jasmine rice seemed to be the obvious pairing for such perfect fish, and a quick stir fry of simply seasoned, still-crisp veggies rounded out the plate quite nicely. This was a truly special meal, one worth savoring. And a good thing too, because I doubt I'll be shelling out the cash for one of these babies again anytime soon, however much I might like to. :(
 Check it out, I finally got a tripod and set up my light box at home, and I really think my photos are coming out much better now. I still have to get the lighting and backdrop right, but at least they aren't blurry and washed out anymore!
Sesame-crusted Tuna Steak with Jasmine Rice and Vegetable Stir Fry
Tuna of this high quality really should never be cooked above medium rare, and rare is really preferable. Cooking it all the way through would completely ruin the nuance of flavor and velvety texture of the fish in its raw state. Honestly, I only cooked it at all because although I enjoy raw tuna as sushi or sashimi, I can rarely eat much of it, and I just loved the contrast of crisp, cooked exterior to meltingly soft interior. Best of both worlds, if you ask me. But please, if you can't handle raw fish, give this dish a pass, because I can pretty much guarantee that you won't like it cooked well-done, either. Stick to tuna salad, in that case.
1 sushi-grade tuna loin steak, about 1 inch thick and about 3/4-1lb in weight
marinade: 1/2 cup soy sauce, 2 tbsp mirin, 1 tbsp sesame oil, 1 tsp honey, 1/2 tsp black pepper
1/4 cup each black and white sesame seeds
2 tbsp vegetable oil (we use safflower)
Combine the marinade ingredients in a shallow bowl, whisking gently with a fork to ensure that the honey dissolves and everything combines evenly. Place the tuna steak in the bowl and turn over a couple of times to coat all sides in the marinade. Cover with plastic wrap and let stand no longer than 30 minutes, flipping halfway through.
Remove the fish from the marinade and gently pat dry with a paper towel. Combine the white and black sesame seeds on a large plate. Lay the fish on the plate and press gently into the seeds, then flip to cover the opposite side. Use your hands to carefully press the seeds onto the fish to ensure they will stick. Transfer to a clean plate and set aside while you prepare to cook.
Heat a cast iron or other heavy-bottomed skillet over high heat until a drop of water dances across the surface and evaporates rapidly. Add the vegetable oil and let stand for just a few seconds to heat, then very carefully add the fish (watch out, it'll sizzle pretty aggressively and some of the seeds may pop). Cook without moving in the pan for approximately 3 minutes. Keep your eye on the sides of the steak: when you see the flesh of the fish start to darken and turn an opaque brownish-grey about 1/4 inch from the bottom, its time to flip. Carefully slide a thin spatula beneath the flesh and flip, using your fingers to help stabilize it. Cook for another 2-3 minutes or until cooked to the same degree as the first side - again, watch the sides of the steak to determine how far its cooked. You want the majority of the steak to remain red and uncooked in the middle.
At this point you should remove the fish to a plate (you can use the same one as before, it wont hurt anything) and place in the fridge or even the freezer to stop it from continuing to cook from residual heat. Let cool for 5-10 minutes before serving.
To serve, slice the steak into 1/4 inch thick slices with a very sharp knife (if you're eating with chopsticks) or simply divide the steak into two even portions (if you prefer a knife and fork - trust me though, go for the chopsticks. Its infinitely more fun and satisfying.). Serve over cooked jasmine rice (plain or seasoned with rice wine vinegar, soy sauce, and/or sesame seeds/oil) with a crisp vegetable stir fry as accompaniment (we chose a mix of julienned broccoli stems, green bell peppers, baby carrots, onions, and sugar snap peas) and garnish with a drizzle of soy and a scattering of fresh-chopped scallions.
(For an extra treat, nibble on a handful of Wasabi-Soy Roasted Almonds for a highly addictive and tongue-tingling pre-dinner nosh! Peanut-free nuts FTW!)