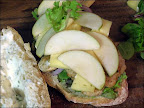
Showing posts with label recipes. Show all posts

Wednesday, January 21, 2009

Negimaki - Beef & Scallion Rolls

One of the reasons I love Japanese food as much as I do is its inherent simplicity. Most of my favorite dishes call for just a handful of ingredients, and achieve their delicious success through the perfect balance of salty, savory, sweet and tangy. Negimaki, the much-loved staple of most Japanese restaurant appetizer menus, certainly falls into this category.


We recently decided to try making these tasty beef and scallion rolls at home using a bit of surplus beef roast from our Sunday dinner. I didn't look at a recipe, but just trusted my instincts and my previous experience with restaurant negimaki to put these together. Overall, they were pretty darn good, but I know some things I would do differently next time.

First of all, I'd use a more tender cut of meat, and try harder to get each slice to an even thickness - J and I both took a turn with the knife, but neither of us were able to get good, clean slices. It would probably also help to be cutting the slices off of a full roast, rather than the small piece we reserved. I'd marinate both the beef and the scallions in some soy sauce and sesame oil, and possibly just a bit of sugar, before rolling. And I would cut the scallions to fit the width of each piece of beef, rather than cutting them into uniformly-sized lengths and then piecing everything together on the roll.

For now though, here is my recipe. Feel free to try it as written, since they were quite tasty, or make your own adjustments. Just remember - keep it simple!


Negimaki - Beef & Scallion Rolls
4-6 slices of beef, somewhere in the neighborhood of 4x6", cut or pounded to 1/16" thickness (you could always simply ask your butcher to cut some beef scallopine style, if you don't want to mess with this yourself)
1 bunch of scallions
salt
black pepper
sesame seeds
toasted sesame oil
soy sauce

Condiments - sweet asian-style chili sauce, wasabi, soy sauce, , sriracha, teriyaki sauce

Trim the ends of the scallions, then quarter lengthwise to get something that resembles long blades of grass. Now cut them into approximately 2" lengths. Divide equally into as many portions as you have slices of beef.

Lay a slice of beef out on a clean plate or board with one of the shorter sides closest to you and season lightly with salt, freshly-cracked black pepper, and a sprinkle of sesame seeds. Place one of your portions of scallions on top of the beef, about 1" in from the narrow edge closest to you and arranged across the full width of the meat, with all of the scallions lying parallel to each other. Now fold the exposed edge of the meat over the scallions and roll up as tightly as you can without pushing out all the scallions. Use some butcher's twine to hold the roll together, wrapping it around the center and both ends. Set aside and repeat the technique to make the rest of your rolls.

Season the outsides of the rolls with a bit more salt and pepper and a drizzle of soy sauce and toasted sesame oil.

Heat a griddle or large frying pan on the stove until very hot. Add a small amount of vegetable oil, then the rolls. Sear very well on all sides - it shouldn't take more than a minute or two on each side - then remove to a plate or board to rest briefly. Drizzle on a bit more soy sauce and sesame oil if you like.

Use a sharp knife to slice each roll into three pieces, then cut away the butcher's twine. Serve standing on-end with your choice of condiments - teriyaki is pretty traditional, but I found I liked them best with some sweet and spicy asian-style chili sauce, while J preferred wasabi and sriracha (as pictured).


We made these into a meal with an incredibly simple stir fry of baby bok choy, shiitake mushrooms, onions and red bell peppers, seasoned with just some soy sauce, rice wine vinegar, garlic and black pepper. This was shockingly good, and far more than the sum of its parts, much like the negimaki themselves.


Its a difficult thing to remember at times, but sometimes simple really is best.

Wednesday, December 31, 2008

Goodness, gracious, great balls o' meat! (Part 2)

I have to admit to being mildly skeptical about this recipe, which is part of the reason that we didn't make it in the same week that we made all of our other meatball-centric meals. I'm a little wishy-washy when it comes to game meats; I like a little gaminess, but I've even had lamb that's been too strong for my tastes, and venison that has been hunted in the wild is much stronger than any farm-raised lamb. I was afraid that this dish, which used up the remainder of a windfall of free deer meat given to us by our old butcher last year, would be exceptionally gamey and unpleasant.

I am pleased to report that I could not have been more wrong.

This was, hands down, the best meal we'd made in weeks, and we are now mourning the fact that don't have access to more venison so that we could make this again.


I'm sorry to say that this was not our original recipe - J did some searching on the internet for meatball recipes using venison and came up with this one, which blended the venison with beef and had them served in a dried cherry and red wine sauce. I thought that sounded pretty good, though in addition to being concerned about the gaminess, I was worried that the sauce would be exceptionally sweet. I needn't have worried about that either - the sauce was a perfect balance of sweet and savory with just a hint of tang, the sort of flavor that just makes you salivate and crave another bite. And when paired with the ultimately mild but distinctive flavor of the venison, these were just about perfect.

J took charge of this recipe, and made a few small changes - his altered version is below. The recipe for my side dish, a warm farro salad with young kale and white beans that turned out to be the perfect earthy counterpoint to the sweet and savory meatballs, follows as well.


---------------------------------

Venison Meatballs in Dried Cherry Sauce
Adapted from this recipe on MyRecipes.com, originally from Christmas with Southern Living, 2000

The original recipe was supposed to make about 4 dozen 1" meatballs. J halved the recipe and made them slightly larger, and we probably got about a dozen or so (which was far too much for dinner but meant we had leftovers that tasted even better the next day). You can make them any size you like - simply adjust your cooking time accordingly.

Meatballs:
1/2 lb ground venison
1/2 lb ground pork
1 tsp salt
1 tsp freshly ground pepper
3/4 tsp ground allspice
1/8 cup minced onion
3 cloves garlic, minced
1 tsp chopped fresh thyme
1 beaten egg
olive oil

Sauce:
1/2 cup chopped onion
1/4 cup chopped celery
2 cloves garlic, chopped
4-5 oz dried cherries (about 3/4 cup)
1 bay leaf
3 whole black peppercorns
1 sprig fresh thyme
1/2 cup Merlot
1 1/2 tbsp balsamic vinegar
1 1/2 cups beef stock

Place ground venison and pork in a large bowl with salt, pepper, allspice, onion, garlic, thyme, and egg. Mix with your hands, being careful not to overwork the meat to ensure a good texture once the meatballs are cooked. Shape mixture into 1.5-2" meatballs.

Heat olive oil in a large skillet over medium-high heat until just shy of smoking, then add the meatballs and sear well on all sides by occasionally shaking the pan to roll them around. Use tongs or a slotted spoon (tongs work better with larger meatballs) to remove the meatballs when they are nice and browned and reasonably firm - you don't need to worry too much about cooking them all the way through here, as they'll finish cooking in the sauce later. Place on a plate or in a bowl and cover with foil to trap them in their own radiant heat, as this will also help them to finish cooking.

Add chopped onion, celery and garlic to the pan and sautee them in the remaining oil and pan drippings until softened and barely colored - keep the veg moving to avoid burning the garlic. Add chopped garlic; cook 30 seconds. Turn the heat down a bit and add the cherries, bay leaf, peppercorns, thyme, wine, and balsamic vinegar, using a wooden spoon to scrape up all the browned bits from the bottom of the pan. Bring mixture to a boil and reduce by half, then add the stock and reduce by half again. Remove from heat and discard bay leaf and thyme.

You want to blend this sauce to a smooth consistency, so use whatever method works best for you. We used our regular blender but if you have a stick blender you could also pour the sauce into a tall container and use that (next time, that's what we'll do - I hate using the regular blender for this stuff). Just a few tips if you use an electric blender: When you put the to on, make sure that one of the openings is fcing the pour spout so that there is a place for steam to escape, and place a towel over the top while you blend. Blending hot liquids can be an explosive ffair if you aren't careful, and once you've had searing hot half-pureed fod go flying around your kitchen once, you never want it to happen again.

Once the sauce is blended, you can push it through a wire mesh strainer if you like, but we didn't bother. Return the sauce to the pan and add the meatballs back in. Roll them around to coat in the sauce and let everything simmer together for a few minutes to ensure even heating and thorough cooking of the meatballs. If serving individual portions, these can be skewered on bamboo skewers or simply placed on a plate with n extra spoonful of sauce. If serving as a group appetizer or a party dish, pour all the meatballs and sauce into a chafing dish or large fondue pot to keep warm and provide toothpicks for self-service. They'll be the best sweet and-sour cocktail meatballs you've ever eaten.


---------------------------------

Warm Farro Salad with White Beans and Young Kale

Young kale is paler green and has smaller leaves than the full-grown kind, and has a milder, slightly less bitter flavor. Use only the curly leaves, discarding the stems. If you can't find young kale, regular will work just fine.

I actually think that this would be equally good at room temperature or even cold, especially if dressed with a simple lemon vinaigrette after chilling, but as I haven't tried that yet myself you'll have to let me know how it turns out.

1/2 cup farro, rinsed and soaked in cold water for 30 minutes
1 1/2 - 2 cups chicken stock (standard ratio for cooking farro is 1 part farro to 3 parts liquid, but I always find I need slightly more, so I start with a cup and a half and add more later if necessary)
1 tbsp red wine vinegar
1 tbsp good extra virgin olive oil
1/4 cup minced white onion
2 minced garlic cloves
2/3 cup canned white beans such as navy or cannelini, drained and rinsed
1 cup roughly chopped young kale, well rinsed
salt & black pepper
freshly grated romano, parmesan, prima donna (our choice, as usual), or other hard, salty cheese, optional

Place 1 1/2 cups of the chicken stock in a medium saucepan and bring to a boil over high heat, then drain the farro and add to the pan. Reduce the heat to medium, cover the pan, and simmer until the farro has absorbed all the water and is tender but still slightly chewy, usually about 20 minutes. You may want to stir it around every so often to keep it from sticking. If you find that the farro absorbs all of the stock but is still a little hard, just add more stock a little bit at a time and continue to simmer uncovered until it is properly cooked. This may take some nitpicking, but you'll get it.

While the farro cooks, heat a bit of olive oil in a small sautee pan over medium heat and add the onions and garlic. Cook together, stirring frequently, until well softened and golden brown - we're going for some slight caramelization here. Add in the kale and white beans along with a tablespoon or so of water, reduce the heat to low, and sautee until the kale has wilted and softened and the beans are exceedingly tender. Set aside.

When the farro is cooked, drain any excess liquid that there may be in the pan (I never have any, but you never know) and gently stir in the kale and beans mixture along with the red wine vinegar, good EVOO, and salt and pepper to taste. Add some grated cheese if you like. We did like, and even added a few extra slices of prima donna to our plates to nibble between bites of meatball and farro - it worked. Really well. Cover the pan and remove from heat to keep warm, but not hot, until ready to serve.

Saturday, November 15, 2008

Why We Don't Go Out For Thai

Consider, for a moment, the plight of the peanut-allergic American. If you don't have to worry about dying from accidental contact with this particular legume, you probably don't even realize how much it's used in everyday foods. Cereals, snacks, candies, and convenience foods often contain things like peanut flour or peanut oil when you'd least expect it. Even those which do not intentionally include peanut products in their ingredient lists will frequently carry that potentially life-saving warning, "Manufactured in a facility which also process peanuts." While this means that your granola bar probably does not contain, nor has it come in contact with, a peanut or its byproducts, it also means that it MIGHT have, and you'd just better not take the chance.

Then there's fried foods, which have at least a 50/50 chance of having been cooked in peanut oil, and sometimes its almost impossible to tell. I often wonder how many unaware folks with peanut allergies get sick every year from innocent trips to Chick-Fil-A. (Because yes, they fry just about everything in peanut oil, and the warning signs in their restaurants are notoriously small and easy-to-miss. I had a close call there myself a few years back.)

If you don't have to think about it, you probably don't realize just how dangerous the world can be for someone with a severe peanut allergy, and how limited the options become when you really take every step possible to keep yourself. And no matter how hard you try to protect yourself, there is still always the slight possibility that, under the wrong circumstances, you just might get hit with an allergy attack seemingly out of nowhere due to a chance encounter of your purse with a peanut shell on the ground.

And possibly worse than all that is the fact that it is damn near impossible to go out for Thai food.


As you may have determined, I am one of those unlucky 1.5 million Americans whose bodies cannot process the proteins in that beloved of all "nuts", the peanut. I've learned as I've grown up how to best avoid accidental ingestion of the evil little beans, and know to be very careful when eating out or trying new foods. However, in my younger days I was sometimes a bit more reckless than I should've been, and it was during those years that I first discovered Thai food.

I suppose I was lucky. There were a lot of Thai restaurants in New Haven County in CT, where I grew up, and I went to at least three different places where I was able to enjoy untainted Thai food, probably due to some extreme care and consideration by the restaurants' chefs and servers. Through these visits I learned to love Thai cuisine, its unique, fresh, and vibrant flavors, colors, and textures, and I became a regular customer to the restaurant closest to home, craving their food constantly between visits.

And then I moved to NY, where there must be a thousand Thai restaurants to try. And it was then that I had my first bad experience in a Thai restaurant, one which must not have taken such impeccable care in keeping their kitchen clean and their peanut products quarantined, because despite having ordered a dish that I knew full well should contain no peanuts whatsoever, I had a reaction and was sick for days.

Since then I have not set foot in another Thai restaurant, other than the one back home that I know is safe.

Just try to imagine not being able to go out for your favorite kind of food because, well, it just might kill you. I probably don't need to spell it out, but I will: IT SUCKS.

But, not being one to take my eating limitations lying down, I resolved that I simply had to be able to make my own Thai food at home, where I knew it would be 100% safe for me to eat. And after introducing J to my beloved "safe haven" Thai restaurant in CT and turning him on to the stuff, he was more than willing to take on the challenge with me.

Since then we have made several soups, stir fries, and noodle/rice dishes from various cookbooks and online recipe sources, some more successful than others but all of them better than no Thai food at all. We will continue to experiment until we have a retinue of reliable, delicious, and authentic (as close as possible, anyway, working within the no-peanuts limitation) recipes that we can turn to whenever we feel that particular, special craving that no other food can satisfy. But for now, the one recipe we've come back to time and time again has been this, my favorite Thai noodle dish and one of my favorite things to eat, ever: Pad See Ew.


A relatively simple dish of wide rice noodles stir-fried with Chinese broccoli or gai lan, egg, and thin strips of chicken or pork with a sticky, sweet soy sauce, pad see ew is a popular lunchtime street food in Thailand. It is hearty and incredibly flavorful, and like so much of the Thai cuisine I've tasted, incredibly well balanced. Sweet, savory, peppery, and tangy flavors meld together into a truly perfect sauce, binding the tender chicken, soft eggs, crunchy broccoli and chewy rice noodles into what I can only describe as the ultimate noodle dish. Seriously, I could eat this stuff every day for a week and not get bored with it. It is amazing to me that such a simple dish with such basic ingredients can taste this good.

The recipe I follow for this dish is slightly non-traditional, but it achieves the same flavor that I fell in love with back in CT, and for that I don't mind breaking the rules a bit. I always use chicken and have never had it with pork, even though I'm pretty sure that pork is the standard protein in Thialand. I also use regular-old broccoli florets instead of Chinese broccoli or gai lan, because frankly I have access to neither. It doesn't matter. Because really, the star of this dish is the noodles; wide ribbons of chewy, starchy goodness that soak up all that delicious sauce and become almost unbearably addictive. I bet you won't be able to stop at one plate.


--------------------------------

Pad See Ew
Adapted from a bunch of recipes that I can't really remember all mashed up together; technique adapted from Pim's Pad See Ew for Beginners.

If you can't find fish sauce, rice wine vinegar, or dark sweet soy in stores near you, try ordering them online from any of a number of Thai ingredient suppliers. That's what we did, and unless you cook Thai every day, they'll probably last you a good long time.

12oz flat, wide dry rice noodles
1 large boneless skinless chicken breast, sliced thinly (you could substitute pork or even tofu here if you wanted)
2 cups broccoli florets (one large crown should do fine)
1 egg
6 cloves of garlic, smashed and minced

Marinade:
2 tbsp soy sauce
1 tbsp rice wine vinegar
1 tsp toasted sesame oil

Sauce:
1 tbsp fish sauce
1 tbsp soy sauce
3 tsp dark sweet soy sauce
2 tsp rice wine vinegar
1-2 tbsp white sugar
1/2-1 tsp black pepper

Vegetable oil for cooking (Choose something with a high smoke point like safflower or grapeseed oil or, if you aren't allergic like me, peanut oil. I won't even bother giving a measurement because it depends on too much - the seasoning of your wok, the type of noodles you use, how hot your stove gets, etc. - just be aware that you will probably use a lot.)

30-60 minutes before you intend to start cooking, mix together the ingredients for the marinade and pour over the slices of chicken in a large bowl. Toss around to coat each piece with the marinade, then cover with plastic wrap and let stand until you are ready to cook.

Place the rice noodles in a dish and cover with hot water (I bring my tea kettle up to just shy of the boiling point) and let stand long enough for the noodles to become pliable. You'll want to move them around every so often with a fork or tongs to keep them from sticking together and forming one giant noodle clump. 5-10 minutes will probably do it, depending on how hot the water is. Just don't let them get soft or mushy, or you'll be setting yourself up for failure later. They need to be able to finish cooking in the wok. Once the noodles are pliable, drain them in a colander and rinse well with cold water, then let stand to drain completely.

Make sure the rest of your ingredients are prepped and ready to go - cut up your broccoli florets and put them in a bowl. Do the same with the garlic. Scramble the egg in another bowl, adding a touch of soy sauce if you like. Finally, make the sauce, whisking all of the ingredients together to help the sugar dissolve. I used the full 2tbsp the last time I made it and felt it was a little too sweet for my tastes, so next time I'll cut it back to maybe a heavy tbsp, but season it according to your tastes. Same goes for the pepper - I like a lot, but use as much as you like.

You should now have a bowl of chicken in its marinade, a colander full of flexible but not-exactly cooked rice noodles, a bowl of broccoli, a bowl of garlic, a bowl of egg, and a bowl of sauce. Now get out your vegetable oil and a big wooden spoon or spatula, and make sure everything is within easy reach of the stove; its time to start cooking, and it's going to move quickly.

Place a large wok over high heat and preheat for at least 5 minutes to ensure the whole pan is heated evenly. Add a tablespoon or two of oil to the pan, enough that you can swirl the pan around and coat as much of the sides as possible. Let that heat up for just a few seconds, then dump in your marinated chicken and garlic. Keep the chicken and garlic moving around the pan by swirling the pan gently and tossing/stirring the meat with your wooden spoon or spatula, letting it cook on all sides without burning. You'll probably get some smoke and some spatter, so just be careful when you move the pan. Once the chicken is cooked and browned in places, remove it and the garlic back to its bowl. Wipe out the pan with a couple of paper towels and replace on the heat.

Now, the broccoli. Add some more oil to the wok, then dump in your broccoli and cook the same way that you did the chicken, though you probably won't need to move it around as much because it wont be as likely to stick as the chicken was. Cook until the broccoli is bright green and slightly softened but still crisp in the stems, and the florets have gotten brown and crispy in spots. Remove from the wok back to its bowl, and replace the wok on the stove. No need to wipe it out this time.

Drizzle some oil over the noodles in their colander and toss around gently so that all of the noodles are individually coated with oil, then add a bit more oil to the wok. This is where things can get tricky, as rice noodles tend to stick like crazy and will break apart and completely lose their structural integrity if they do, so although it goes against my usual healthy sensibilities, use as much oil as you need to keep that from happening.

One the noodles are coated and the oil in the pan is hot again, dump in the noodles and get them moving in the pan immediately. The longer they stay stationary, the more likely they are to stick. Stir fry them until they start to show crisp, brown spots. Now, this is the only part that I still have trouble with - move the noodles up the sides of the pan where it will be cooler, creating a well at the very bottom of the pan, and pour in the scrambled egg. Resist the urger to start shoving it around in the pan the way you have every other ingredient - the noodles at this point should be lubed up enough that they won't stick, and the egg needs to cook without being fooled with for awhile so that it can actually set up. You want to be able to break it into pieces once its cooked, not turn it into a coating for the noodles.

Give it just a minute or two until it looks mostly opaque, then get in there and stir to break it up a bit and toss it with the noodles. Now dump the chicken, garlic, and broccoli back into the pan, toss it all together, and finally pour in all the sauce. Do your pan-shaking/hot-food-tossing bit until everything in the pan is coated in sauce, the noodles have absorbed most of the liquid, and the heat has thickened up anything that's left, just a minute or two. You should get a bit more caramelization and browning during this step. Remove from the heat and serve immediately, with an extra shake of black pepper and a drop or two of soy sauce as a final flavor boost.

Saturday, November 8, 2008

SSD: The Standard Steak Dinner (TM)

Ok, so its not really a trademarked name. At least, I don't think it is. But believe me, it should be, because a steak dinner just doesn't get any more tasty, classic, or all around RIGHT than this. And once you've tried this, I can almost guarantee you'll agree with me.

The SSD is the only original meal that we've come up with in our almost 4 years of cooking together that we've consistently gone back to several times a year, and have never really had to change. Its part recipe, part formula, and all delicious.


The recipe part of it that never, ever changes is my original sherry steak gravy. "Gravy" is a bit of a misnomer here; there is very little about this recipe that resembles your standard brown, smooth, thick sauce that is usually served with roast beef or turkey. Instead, it is coarse and rustic with diced onion, garlic, mushrooms, and a goodly amount of bacon, with the gravy part being more of binder than anything else. It is sweet, savory, and peppery, a perfect companion for a thick, medium-rare steak, and I've barely changed the recipe since I made it the first time nearly 3 years ago.

The rest of the meal is just a simple formula, wherein the components follow a theme but are easily substituted and adjusted to achieve the same general result without getting old or tired. This formula is incredibly classic: a good cut of steak, simply seasoned with kosher salt and black pepper; a green vegetable; a potato dish. But I'm a big believer in the philosophy that if a thing ain't broke, you shouldn't try to fix it.


The beauty of it is the wide range of options available for each component. You could use a sirloin steak, or a ribe eye (as we did here) or even a filet. You could sautee up some broccoli or spinach or steam some snow peas, any of which could follow your particular favorite side dish recipe. And we all know how versatile potatoes are. Want a mash? Go for it. Scalloped potatoes your thing? We've done that too. Baked and stuffed? Roasted? Hashed? They all work. There's really just no way to break this meal.

But the sherry gravy is what ties everything together, each and every time. And we have never made this meal without feeling completely and utterly satisfied when our plates are clean.


We made an SSD earlier this week, upon realizing that it'd been several months since we last did so. This time around we used some well-marbled rib eyes for the steak, and combined the potato and green veg by roasting some cubed red potatoes and halved brussels sprouts together. And incidentally, if you think you don't like brussels sprouts, I absolutely recommend that you try them this way. I first discovered them last fall, having never actually tried them before and therefor being devoid of any of the normal negative connotations that most people have. And at first taste, I loved them. Slightly sweet and tender-crisp when cooked correctly, I often find myself craving them when the weather gets cool. And when they are roasted this way, their natural sugars concentrate and caramelize on the outside, much the way carrots or sweet potatoes do, and they become positively candy-like. Seriously, just try these. They aren't your parents' sprouts.

-------------------------------

Eri's Sherry Steak "Gravy"

I have always used white button mushrooms in this recipe, because I like their texture and mild flavor. However, I recommend that you use whatever variety of mushroom that you prefer - I am sure it would be equally good with portobellos, creminis, or shiitakes. I'd even like to try this with porcinis... sometime when I don't mind potentially breaking a recipe that has been so completely foolproof for so long.

This recipe makes enough "gravy" to top two average-sized steaks.

1 tsp olive oil
1/2 a white onion, diced
2 cloves garlic, minced
2 slices fatty bacon, chopped
1/2 cup diced white button mushrooms
1 tsp black pepper (Believe it or not, I use preground pepper for this because the first time I made it, we didn't have a pepper grinder, and I haven't wanted to change the finished product. Feel free to fresh-grind your pepper, though I might suggest cutting back a bit as fresh-ground pepper is significantly stronger.)
1/2 cup strong beef stock (and I mean STRONG. I've always made this with beef stock cubes, using twice as much as the package directs for the amount of water. You could also use a demi glace, or homemade stock that you boil down to half-volume.)
1/4 cup sherry (the real stuff. Don't go using "cooking wine" in this recipe.)
1/2 tbsp brown sugar
1/2 tbsp worcestershire sauce
1/2 tsp cornstarch (optional)

Heat the olive oil in a small sautee pan (not nostick) over medium heat until gently shimmering. Add the bacon and cook slowly to render out as much of the bacon fat as possible into the pan. When the bacon is about half cooked, add in the onions, garlic, and mushrooms, and sautee until everything is softened and the onions are translucent.


Crank up the heat to high for a few minutes to achieve some slight caramelization on the veg and develop a bit of fond (stuck on brown bits) on the bottom of the pan. Deglaze the pan with the sherry, then add the stock, worcestershire, pepper and brown sugar. Turn the heat down again to medium-low and simmer for 5-10 minutes, until the mixture thickens slightly and about half the liquid has boiled away. At this point, if you like a thinner gravy, you could use the gravy as-is. Or, you could thicken it by placing the cornstarch in a bowl, adding a couple spoonfuls of water or gravy liquid and stirring to dissolve, then adding the mixture back to the pan and stirring to combine. This will create a thick, velvety sauce to bind all the ingredients together.

Spoon the gravy over your choice of steak and serve hot.

------------------------

Roasted Red Potatoes and Brussels Sprouts

This was the first time I've successfully achieved the crisp outside, fluffy inside roasted potatoes that most people dream about. I think that the pre-cooking step, the generous amount of olive oil, and the high heat in the oven were what make it work, and for once they were totally perfect. I didn't measure anything or keep track of time while I was doing this, however, so I'm making some guesses here. I will be retrying this method tomorrow when we have some friends over for dinner, so I will try to pay more attention and nail down this recipe.


2-3 large red potatoes, washed and cut into one-inch cubes
1 cup brussels sprouts, stems trimmed, outer leaves removed, and halved
4 cups water
2 tbsp + 1 tbsp kosher salt
1 tsp fresh-cracked black pepper
2 cloves garlic, smashed and chopped
2 tbsp olive oil
1 tsp good balsamic vinegar

Preheat your oven to 425 degrees and line a baking sheet with aluminum foil.

Pour the water into a saucepan and add the 2tbsp salt and cubed potatoes. Bring to a boil and cook until the potatoes are about half-cooked, probably about 5 minutes.

Meanwhile, whisk together the olive oil, 1 tbsp salt, black pepper and garlic in a medium-sized bowl.

When the potatoes have reached the desired level of doneness, remove with a slotted spoon to the baking sheet and allow to dry and cool slightly for 2-3 minutes.
Add the trimmed and halved brussels sprouts to the pan of boiling water to blanch for 2-3 minutes, or until bright green and slightly softened.

Once the sprouts are in the water, pour half of the seasoned olive oil over the potatoes on the baking sheet and toss with your hands until the potatoes are covered, then place the sheet in the oven. They will need at least 10-15 minutes on their own before you add the brussels sprouts.

Drain the blanched sprouts and add, while still hot, to the bowl with the remaining seasoned olive oil. Add the balsamic vinegar and toss gently to coat.

Remove the pan with the potatoes from the oven and flip gently with a wooden spoon or silicone spatula - you'll notice that the parts touching the baking sheet will be the most golden browned and crispy. You'll want to flip them like this over the course of their cooking time to ensure that all sides get evenly browned.

Add the brussels sprouts with their marinade to the baking sheet and spread out so that all the sprouts and potatoes are in a single layer. Return to the oven and continue to bake, turning every 5 minutes or so, until everything is nicely browned and crispy on the outside. For me, this took approximately 15-20 minutes. When they are done, remove from the oven and hit with a last sprinkle of kosher salt and black pepper while they are hot. Serve immediately so that they retain their crispness.

Saturday, October 25, 2008

The easiest way to share a pie...

...is to make multiple pies in miniature!


One of the biggest challenges of cooking for two, for me anyway, has been finding ways to experiment with desserts and baked goods. Most people I know would just bake a cake if they felt so inclined, then just keep it around and gradually eat it over the course of a few days or a week. But, truth be told, neither J nor I have ever had a particularly strong sweet tooth, and although we enjoy having dessert once in awhile we tend to lose interest and let things go to waste if we have a lot of a single thing sitting around. And since we've been making a concerted effort to improve our eating habits over the past year and a half or so, even if I were able to produce some fantastic sweet treat that we could both eat forever without getting sick of it, we wouldn't allow ourselves the indulgence.

Of course this doesn't stop me from baking on a relatively regular basis, and both of our workplaces have gotten rather spoiled from being gifted with our leftovers (apparently I have something of a reputation at J's office, and anything he brings in disappears in half an hour, tops). This is particularly easy to do when it comes to things like muffins, quickbreads, biscuits and scones, and even yeasted breads, as they can all travel well and can be either baked in individual-sized portions or divided with ease. These types of things have made up the vast bulk of my baking experiments for nearly three years.

But, there's so many other things I want to try! I'll always love making muffins but sometimes, I just want to do something different and challenge myself a bit. But the additional challenge is always finding a way for J and I to enjoy something new, without ending up drowning in custard and buttercream for a week.

My favorite solution to this problem is to bake in miniature.

Now, I have a particular fondness for all things tiny, so I don't mind much that miniaturizing regular desserts almost always creates twice as much work. Some folks would balk at that, and understandably so, I think - making these itty-bitty apple pies took me a LONG time last weekend, and there are a lot of other things I could have done with that time. But the finished result was absolutely worth it: buttery, flaky, peppery crust filled with sweetly spiced diced apples and topped with decorative pie-crust cutouts, each one just the right size for a single diner's after-dinner sugar fix. J and I were each able to have one the day I made them, and the rest were packed away in tupperware and carried into the office the next morning, to be devoured by my coworkers before 10am. I consider those hours in the kitchen to be time well spent.

Of course, I ended up making too much apple filling, and had to use it up by (you guessed it) baking muffins. I think I'll just have to accept eventually that my destiny lies in a muffin tin.


Miniature Apple Pies

I made these pies using the excess half-batch of dough made for this weeks Barefoot Bloggers challenge, to which I had added a generous amount of kosher salt and black pepper, so my crust was savory rather than sweet. However, I very much enjoy the interplay of savory and sweet in a dessert, probably because my tolerance for sugar is a little on the low side, so I actually thought the crust was perfect for this. You can, of course, use your favorite pie crust recipe, or use store-bought. I promise to look the other way if you do.

Also, as I said, I had way too much pie filing when I made these, so I'm guesstimating on how much you'll ACTUALLY need. I'd recommend making extra though, just to be safe, because there will always be uses for sugared and spiced apples. Put them on yogurt, or in some oatmeal, or just eat them straight out of the bowl. Or, you know. Make some muffins.

Pie Crust Dough (you'll need about the same amount that you'd use for a single-crust pie, whether its homemade or store-bought)
2 medium-sized baking apples (granny smiths are common, but I used a couple of massive sweet Mutsus that we'd picked ourselves a couple weeks ago)
1 tbsp lemon juice
1/3 cup packed brown sugar
1 tbsp ground cinnamon
1/2 tsp ground clove
1/2 tsp ground allspice
1 tsp freshly grated nutmeg

Preheat your oven to 400 degrees. Spray the cups of a standard 12-cup muffin tin with non-stick baking spray (I'm a big fan of Pam For Baking, myself) or butter and flour them.


Peel and core the apples and cut into a small dice, somewhere between 1/2" and 1/4". Place in a bowl with the lemon juice, brown sugar, and dry spices. Stir to coat every piece of apple with the sugar and spice mixture, then set aside to macerate while you prep the dough.


Roll our your pie dough so that its slightly less than 1/4" thick. Using a round cookie cutter thats slightly bigger in diameter than the muffin cups, cut out 12 rounds of pie dough. Collect the scraps and reroll if necessary.

At this point, if you'd like to decorate your finished pies with crust cutouts, roll out whats left of your scrap and use miniature cookie cutters to make itty bitty crust cookies (or, freehand it with a sharp knife). Line a baking sheet with parchment paper and place them an inch or two apart. They can be baked as-is or brushed with an egg wash and sprinkled with sugar for a crunchy sweet topping (this is what I did). I recommend turbinado sugar.

Now here is the slightly tricky part. Carefully lift each round of dough and place into one of the cups of the muffin tin, and use your fingers to very gently press it into the bottom of the cup, making sure its flush to the bottom and sides with no air bubbles but not tearing it. You may need to work the dough further up the sides of the cups by pressing it upwards with your fingers. I won't lie, this is a fiddly bit of work and its very easy to end up with holes. The good news is that its easy enough to patch those holes by tearing off little bits of dough from your inevitable pile of scrap and just pressing them into the crusts to seal. Just be sure that you do patch any holes that appear, or you'll have pie filling running all over the place when the pies are baked.


Once all your little dough rounds are in and you have a tray full of mini pre-pies, take a fork and prick the crusts all over to allow steam to escape - this is called "docking" and will prevent bubbles from forming in the crust when you parbake it. But don't worry, these holes won't be big enough to cause filling-leakage.

Slide the muffin tin (and the baking sheet with your cutouts, if you made them) into the oven and bake for about 10 minutes, until the crusts are just starting to crisp up and take on some golden brown color - this will prevent them from getting soggy bottoms when they're baked with the filling. Remove from the oven and set the baking sheet with the cutouts aside to cool. Spoon a heaping tablespoon of apple filling into each crust (or more, if necessary - you want the filling to be rather mounded, as it will cook down and become more compact after it bakes, so if you need to go back and add a bit more to each one after filling them all, go ahead). Spoon any syrup that's collected at the bottom of the bowl over the pies for a little extra moisture and flavor.


Return to the oven for another 15-20 minutes, until the filling is hot and bubbling and the edges of the crusts are a nice rich golden brown. Remove from the oven and let stand in the muffin tin for a moment to cool - now would be a good time to add the crust cut-outs, so that they'll stick while the filling is still warm and gooey. Then remove the pies to a wire rack to cool completely. Or, eat immediately, if you're so inclined. Mmmmm, warm-from-the-oven apple pie.


Remember, these are designed specifically for sharing, so spread the love! Give some to a neighbor or invite some friends over, or just do what I did and bring them into work. I guarantee, people will love you.

Optional: If the pie-crust cutouts are a little too fussy for you, you could bake the pies "naked" or make a streusel topping from some cold butter, flour, brown sugar, and oats if you like them. Just top the pies with streusel when you fill them, and they'll bake up with a sweet and crunchy topping that everyone will love. I do not, however, recommend actually making these double-crust pies - in their diminutive size, the ratio of crust to filling would be way off.

Wednesday, October 8, 2008

Ooey Gooey Crispy Savory-Sweet Heaven

Its not often that we make sandwiches here at Table for Two. Mostly because we try to keep our carb intake at a pretty low-level, and sandwiches are arguably defined by the bread they're made with. Don't get me wrong - I love bread. I love it in a way that is not entirely healthy or chaste. But if I ate it all the time I'd be a whale.

That being said, part of the appeal of receiving that free sample of Ile de France cheese was the opportunity to enter a recipe contest using the cheese. And as much as I love soft-ripened cheeses exactly as they are, I really go ga-ga for them when they're given a bit of heat and turn into molten, decadently-creamy bliss. And I also think that this particular application of the cheese is perfectly suited to sandwiches, particularly pressed sandwiches, where the heat melts the cheese and helps it act as a binder for all the other fillings. So, upon receiving and tasting my wheel of camembert, I just knew that it needed to go in a panini.


I'll admit, this maybe isn't the most original sandwich recipe in the world, but it IS sinfully delicious. Crispy-outside/tender-inside ciabatta rolls are spread with a lemon garlic aioli, then topped with fresh, vibrant spring mix, crunchy and pungent red onions, herb-rubbed turkey cutlets, slices of camembert, and finally, sweet apples. In the absence of a panini-press or, perhaps, a George Foreman grill (my favorite and most-missed kitchen appliance from my two years living with three friends in Queens), the sandwiches got wrapped in tin-foil and pressed beneath foil-wrapped bricks that had been heating in the oven for almost an hour.


The final product is a significantly flatter, crispy, crunchy sandwich just oozing with ooey, gooey, melty cheese, acting as the glue between the turkey, apples, and roughage. Biting into this sandwich is like getting a little taste of early fall, warm and comforting with the aromatic flavors of autumn produce and herbs. This is one we'll be making again, for sure.

------------------------
Pressed Turkey Panini with Camembert and Apples

Its fairly easy to get thin-cut turkey cutlets in most grocery-stores nowadays - we're partial to Shady Brook Farms, ourselves, and buy them often. This time, we bought a whole boneless breast from Iavarone and sliced off four cutlets ourselves, pounding them to an even thickness before cooking. Whatever method you use, just be sure you have enough turkey (one cutler or two) to create a single even layer on the sandwich.

Also note that we aren't going for overstuffed, here - the key to this sandwich is even distribution of fillings and the proper balance of flavors, and a huge sandwich will never press correctly.

I'm writing this recipe using our hot-brick method, but if you happen to own a panini press or George Foreman grill, you can use that however you normally would.

4 thin turkey cutlets
1/2 tsp poultry seasoning
1/2 tsp salt
1/4 tsp black pepper
1 tbsp olive oil

1/4 mayonnaise
1 clove garlic, grated
1/4 tsp black pepper
zest of one lemon

2 fresh ciabatta rolls
1 cup spring mix salad greens or arugula
1/2 small red onion, sliced thin
1 small sweet apple, cut into 1/4 inch thick slices (we used a Macoun but any sweet or semi-sweet variety would do)
4 oz Ile de France Camembert, cut into 1/4 inch slices (trim the rind if you like)


Preheat your oven to 450 degrees. Wrap two bricks in foil and place in the center of the oven and allow to heat for 45 minutes to an hour.

For the turkey:
Sandwich the turkey cutlets between two sheets of plastic wrap and pound then gently with a meat mallet to flatten and tenderize them - you want them slightly less than 1/4 inch thick. If your cutlets are already very thin, you can skip this step.

Season the cutlets with the poultry seasoning, salt and pepper.


Heat the oil in a large skillet until a drop of water flung into the pan pops and sizzles. Carefully add the turkey and sear on each side for about 2-3 minutes until golden brown and cooked through. Remove from heat and set aside.

For the aioli:
Stir together the mayo, garlic, lemon zest and pepper.

To assemble the sandwiches:
Split the ciabatta rolls and pull out some of the bread from the center - this will make more room for the fillings and keep them from being squeezed out during the pressing step.


Slather the tops of the rolls with the aioli. Stack the fillings on the bottom half of the roll, starting with the salad greens, followed by the red onions, then the turkey cutlets, the cheese slices, and the apples. Divide your fillings evenly between the two sandwiches, and don't try to use all of them if you don't have room. Remember, less is more here.


Finish with the tops of the rolls and press down slightly with your hands. Wrap each sandwich tightly in tinfoil, and place on a baking sheet.


Using hot pads/oven mitts, carefully remove the now VERY hot bricks from the oven. Again carefully, place one brick on top of each sandwich, pressing down to be sure they will be stable. Place the entire baking sheet back in the oven to give the sandwiches a chance to heat through - 5 minutes or so should do it.


Remove from the oven and remove the bricks. Unwrap the sandwiches enough to expose the tops of the rolls, then replace the bricks or a few minutes to crisp up the crust. No need to put them back in the oven for this - the sandwiches will be plenty warm and the bricks will have retained enough heat to do the job.


Remove the bricks to a safe place to cool down, cut the sandwiches in half, and enjoy!


This is my entry for the Ile de France recipe contest. If you like this recipe, please visit the Ile de France blog and vote for me between October 16 and November 3!

Tuesday, July 29, 2008

A journey of a thousand miles...

We all know the way the quote ends, and we all know the lesson to be learned - that sometimes the hardest part of starting something new is exactly that: starting.

I've tried to get this food-blog-thingamajig started quite a few times by now, experimenting with themes and regular features and clever titles... and never got more than a post or two in before losing interest or giving up because it was too much work, too controlled, not controlled enough, etc. etc. ad nauseum.

I'm really good at making up excuses to be lazy if given the chance.

Thankfully, my boyfriend, J - who has been my partner in kitchen-crime and a great source of motivation and inspiration for the past three years - finally made me see sense. We were enjoying a particularly successful meal, one made better by the complete originality of a recipe we'd developed and executed together, when he said "I don't know why you keep trying to come up with crazy themes and challenges and whatever else for your food blog; THIS is what you should be writing about. This is what we do and what people will be interested in." And he was right.

Or at least I think he is; only time will tell. At any rate, here I am, with a fresh start and a fresh attitude, ready to bring our experiments and experiences in the kitchen to all of you curious cooks on the web, for better or worse. I have to admit I feel optimistic that this time I just might be able to stick with it!

So, to kick things off, I'd like to share one of our more recent meals that I was particularly proud of. You see, one of my great lifetime goals (and one that J certainly agrees with) is to learn to create really high-quality pizzas and other pizzeria treats (calzones, strombolis, garlic knots, etc.) at home. J makes a really fantastic marinara sauce, and I think we've got the topping to sauce ratio down pat, but as most home cooks can attest to, probably the most difficult component to perfect is the dough used to make the crust. I believe that a really great pizza dough can be used to make all those pizzeria goodies we love, but that means I've really got to get it right if I'm ever going to get ANY of them right. A little daunting, you must admit.

However, I'm up for the challenge, and for the last 2 years or so have been experimenting with different recipes from different sources, often making my own adjustments, in search of this perfect dough.

Most of my attempts so far have failed miserably in one area or another - too dense, too chewy, too bland - but this last one has been the most successful yet. Its based on the recipe in Williams-Sonoma's Essentials of Baking, which I've now made on 3 different occasions, making small changes each time. This time around it was flavorful, airy, and crisp when baked correctly (and I've tried two different methods - on the grill and in the oven on a pizza stone). It's still a bit on the thick side, but I have some ideas to fix that for next time. I do feel I'm getting closer though.

This meal was actually made with excess dough from the aforementioned grilled pizza, inspired by a trip home to Connecticut for a family party where my parents served stuffed breads from Bobby's Apizza, something I grew up on and have loved my whole life but haven't had since leaving CT. J, being from New Jersey, immediately recognized the breads as what Jerseyans (totally just made that up) apparently know as 'bolis - strombolis to the rest of the country. He loved Bobby's bread as much as I always have, and immediately requested that we make some at home the following week. Needless to say, I was happy to oblige.

As a filling for our 'bolis, we chose some fresh pork sausage with cheese and parsley from the Italian specialty store where we grocery shop regularly, some fresh green broccoli, and a mixture of 4 cheeses (fresh mozzarella bocconini, aged asiago, and a cheddar-jack blend). I also made a long-simmered sauce from some fresh plum tomatoes for dipping. This was a rather lengthy meal to prepare, and would have been moreso if I'd had to make the dough from scratch, but luckily we planned it for a day when I would be home from work and could spend as much time as I needed in the kitchen. Ah, bliss. I suggest, however, that you plan a day or two in advance to make these 'bolis, as the long rest included in the dough recipe really helps to develop the flavors in the finished crust. Its not necessary, but trust me, its worth it.


Don't be ashamed if this makes you drool just a little bit. Its ok. I understand.


Sausage & Broccoli 'Boli
with Homemade Marinara

The dough recipe will make double what you'll need to make two big strombolis, one of which was more than enough for the two of us for dinner (so technically you can use this recipe to serve four). The extra dough can be wrapped tightly in plastic and frozen for later use - just take it out of the freezer and let it thaw for a few hours in your fridge or on your counter when you want to use it. I suspect it would last for at least a few months this way.

Dough (adapted from Williams-Sonoma Essentials of Baking)

2 1/2 packages active dry yeast*
2 1/4 cups warm water (W-S recommends 106-115 degrees; use an instant read thermometer to be sure, yeast can be finnicky)
2 tsp sugar
1/2 cup olive oil
5 cups bread flour (AP can be substituted if necessary, but the texture will be different) plus extra AP flour for dusting and shaping
1 tbsp sea salt
Optional: a tablespoon or two of garlic powder, onion powder, and/or dried Italian herbs like oregano, rosemary, or parsley

In a large bowl, combine the water and sugar and stir to dissolve. Stir in the yeast and let sit for 10-15 minutes until the mixture foams heavily. (This may sound geeky, but I recommend hanging around to watch - if you've never seen yeast "bloom", its really pretty cool!). Add all of the flour, oil, salt, and any of the optional seasonings you decide to use (I skipped them this time around, but I usually like to use a mix of garlic, oregano, parsley, and black pepper in mine). Stir with a wooden spoon until the dough begins to come together and pull away from the sides of the bowl - it will be stiff, so use your muscles! (Or, use a stand-mixer for all this. I'm not one of those lucky people that has one. Not yet, anyway. But someday...oh, someday...)

Once the dough reached this stage, dust a clean counter or tabletop generously with AP flour and turn the dough out of the bowl. Dust the top of the dough with more lour, and probably your hands too, and get kneading. Its hard to say just how long you'll need to knead your dough - it depends on a lot of things, from the quality and gluten-content of the flour to the purity of your water - and you'll really just need to use your own judgement. The goal is a smooth, pliable dough that is slightly tacky but not sticky, and won't rip if you stretch it a bit. I think it took me about 10 minutes of kneading to achieve this. Don't worry if it takes longer though - just think of it as a good workout for your upper arms.

Once you've got your dough properly kneaded, form it into a ball and let it relax a bit while you wash your mixing bowl out and coat it with olive oil. Place the dough back in the bowl and cover with a clean tea towel, then place in a relatively warm place to rise for about 1-2 hours or until it's at least doubled its bulk.

At this point, you could theoretically go ahead and make your 'bolis, but I suggest this instead: divide the dough in half and place each half in a sturdy zip-top bag. Toss one half into the freezer for another use, and the other into the fridge to slow-proof for at least 12 hours, but the longer the better.

*This seems like a good place to slip in my note about the yeast. The original recipe called for 2 packages of yeast; I used the extra half because I had it leftover from a previous baking experiment that used very little of the stuff. I mostly did this A)to use up the yeast, and B)because I thought the extra yeast would improve the flavor and airiness of the finished crust. I was right, but the dough WOULD NOT STOP RISING. I swear, it was like some kind of alien blob. Even in the fridge, where the cold temperature should have (or so I thought) stopped the reproduction of the yeast, it just kept rising and rising, albeit a little slower than it did on my countertop. As such, although I really did like the flavor of the dough, I would recommend either sticking to the 2 package amount, or storing it in your fridge in a bag that is far larger than the dough itself to allow for further rising. However good the flavor ends up, its not really worth it for a sticky, doughy mess in your fridge unless you prep ahead.

Anyway, the next day (or two or three days later - I think that the longer you let it sit, the better the flavor will be, but I don't know exactly how long the dough will last, so I wouldn't let it go longer than maybe 4-5 days) you're ready to assemble and bake your 'bolis.

Filling

4 links fresh sausage (about 1lb)
1 small head of broccoli, cut into bite-sized pieces (by all means, use the stems as well as the florets)
1 cup cheddar-jack shredded cheese blend
1 cup bocconcini, sliced into 1/4 inch rounds
1/2 cup finely shredded or grated aged asiago
S&P to taste

Preheat your oven to 500 degrees. If you have a pizza stone, place it on a rack as close to the center of the oven and let it preheat as well for a minimum of 30 minutes - the hotter the stone gets, the crispier the bottom of your 'bolis will get.

Heat a skillet large enough for your sausages over medium-high heat and coat the bottom of the pan with a small amount of olive oil (you won't need much - the fat from the sausages should help lubricate the pan). One the oil starts to shimmer a bit, carefully drop in the sausages - they may spit and pop a bit - and clamp a lid over them to keep in the heat and avoid splatter. Cook the sausages this way, shaking the pan every few minutes to let them brown on all sides, until the sausages are mostly cooked through, probably around 10 minutes. If they're still a bit undercooked in the middle, thats ok as they'll continue to cook when the 'bolis are baked.

While the sausages cook, bring a large pot of salted water to a boil and drop in your broccoli to blanch for 2-3 minutes or so - the broccoli should be bright green and only just tender, we're going for that "tendercrisp" texture that everyone's been talking about here. Lift the broccoli pieces out of the water with a large slotted spoon or spider and immediately dump into a bowl of ice water. This will keep them from continuing to cook from their internal heat, and cause them to retain that beautiful bright green color. Once the broccoli is cool, drain in a colander and set aside.

Once the sausages are cooked, move them from the pan to a cutting board and let them rest for a few minutes so that they'll reabsorb all their juices and cool down a bit, otherwise they'll be hard to handle. Slice the sausages into 1/4-1/2" slices and set aside.

Now, retrieve your dough from the fridge. Dust a work surface with AP flour and dump the dough onto the surface. Divide into two even pieces. Working with one piece at a time, stretch and roll the dough into about a rectangle. It doesn't need to be a perfect shape, but it should be an even thickness, preferably no thicker than 1/8-1/4".
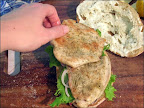
Turn the dough so that the long side is facing you and being to layer in your fillings. You'll want to keep everything in the center of the dough in a vaguely rectangular shape, leaving enough room on either short side to fold over the top of the fillings, and about 1/2" on each of the long sides to seal the 'boli once its folded. Using half of each of your fillings, start with a layer of shredded cheddar-jack, then a layer of sausage slices, then a layer of blanched broccoli, then a layer of bocconcini slices, and finally a layer of grated/shredded asiago. Sprinkle the whole thing with salt and pepper, and drizzle with a bit of olive oil if you like.

To wrap the 'boli, brush both of the exposed long sides with some water. Take one of the bare short sides and fold it over the top of the filling. Brush the top of that piece with some more water, and fold the other short side over it. Use your fingers to press the edge of the dough into the dough beneath it, gently rolling and crimping if necessary to create a tight seal. Then roll and crimp each end of the package to seal them as well. Dust the back of a cookie sheet with some flour or fine corn meal and carefully lift the finished 'boli onto it and set aside. Repeat the entire process with your second portion of dough, using up all your fillings. (Note: I also brushed the top of each 'boli with a bit of olive oil and sprinkled over some coarse sea salt and dry herbs, because I had neglected to add it to the dough itself - feel free to do this as well.) Use the tip of a sharp knife to cut some small slits in the top of each 'boli to allow steam to escape - otherwise the seams may split and the fillings will leak.

Once your oven has reach the proper temperature and your baking stone is hot, open the oven and carefully slide the rack out enough that the stone will remain stable but you can get to the whole thing easily. Being careful to keep your fingers away from the hot stone, carefully lift or slide the 'bolis off of the cookie sheet and onto the baking stone, making sure they are evenly spaced apart. Slide the whole thing into the oven and, if you like, spritz a bit of water into the oven before closing the door - this will help the crust to crisp up. (If you don't have a stone, feel free to use a regular baking sheet. You can even still preheat it, but be sure its sturdy enough to stand up to the high heat we're using.)

Bake the 'bolis for about 20-25 minutes or until the outer crust is crisp, golden brown. Cool on a wire rack until they are cool enough to handle, then cut into slices and serve with marinara sauce for dipping. You can use your favorite sauce or the recipe that follows.

Homemade Marinara

I tend to make sauce in sort of a flying-by-the-seat-of-my-pants method; I almost never follow a recipe but follow my own intuition. As such, all quantities and directions here are approximate. I suggest that if you use this recipe, you simply use it as a foundation and adjust it to suit your own tastes - that's really the best way to develop your own recipe, anyway.

6-8 ripe plum tomatoes, cored and cut into large chunks
6 cloves of garlic, smashed and minced
1/2 cup each diced white onion and carrot
2 cups beef or vegetable stock
1/4 cup balsamic vinegar
1-2 tbsp sugar
3 tbsp olive oil
1 cup loosely packed fresh basil leaves, torn or roughly chopped

Add 1 tbsp olive oil to a medium skillet and heat over medium heat. When oil begins to shimmer, add the onion, carrot and garlic and sweat until the vegetables are soft. Remove from heat.

Place all ingredients except the basil into a blender and puree until almost smooth. Pour into a large pot and bring to a simmer over medium heat. Cover and continue to simmer for 2-3 hours - the sauce will deepen in color and flavor and thicken as the liquid gradually starts to evaporate. Remove from heat and stir in the fresh basil. At this point you can use the sauce as is or, if like me you prefer a smooth sauce for dipping or pizzas, either pour the sauce back into your blender and puree until velvety smooth, or use a stick or immersion blender if you have one (its much easier and will work much better). Incidentally, I realize I could have just cooked everything together in the pot first without pureeing the first time and saved myself a step, but I like the way the flavors meld when everything is blended up together and I honestly didn't expect to need to blend it the second time... I found that even after the long cooking time, the sauce had a bit too much texture for my tastes.